User Manual for Falcon phones
(units shipped directly by ScannerPal, prior to 2/19/09)
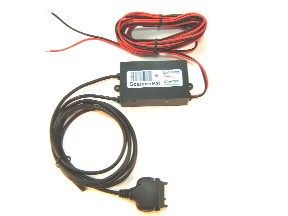
The Lightning Charger is supplied with a red/black power cord, to be attached to a fused source of ignition-on +12 volts. As with all automotive accessory installations, the Lightning Charger system must be fused. An inline-style AGC-2 fuse (with fuse holder and inline crimp connector) is provided if power is not tied to an existing fuse block. It is up to the installer to provide a fuse (maximum 2 amp) in the circuit, at the power source, for the installation method chosen.
Wiring is conventional: The red wire goes to a fused source of ignition-on +12v power. The black wire goes to vehicle ground. This will power both the Lightning charge and logic circuits. If the wires are reversed the unit will fail to operate until they are corrected.
Installation Instructions:
- You must properly fuse the Lightning Charger and protect it from exposing bare wires, to avoid fire hazard.
- The Lightning Charger system is only to be installed for use with a Nextel Motorola Falcon Series phone, and powered by DC 12v.
- Test the location of the phone mount to verify that the intended operation will be suitable for the Lightning Charger phone cable. Be sure that all cables will be located where they will be clear of any rubbing or chafing during operation. If rubbing or chafing cannot be avoided, use shielding material or conduit to protect the cables.
- Inspect the fuse supplied with the cable to verify that it is a 2 amp fuse. If wiring to an existing fuse block, be certain that the fuse used is rated for 2 amperes or less, and that the fuse is dedicated to the Lightning circuit. If a splice is made into existing vehicle wiring, the vehicle wiring must be 22AWG or larger. Runs longer than 10 feet should be made with 18AWG or larger.
- Confirm that the positive (red) cable end is covered and that no bare metal on the positive side of the circuit is exposed. The negative (black) cable end is to be fastened or wire-spliced to vehicle ground.
- All terminal and inline crimp connections must be made using automotive-grade connectors, and performed according to professional vehicle wiring practices.
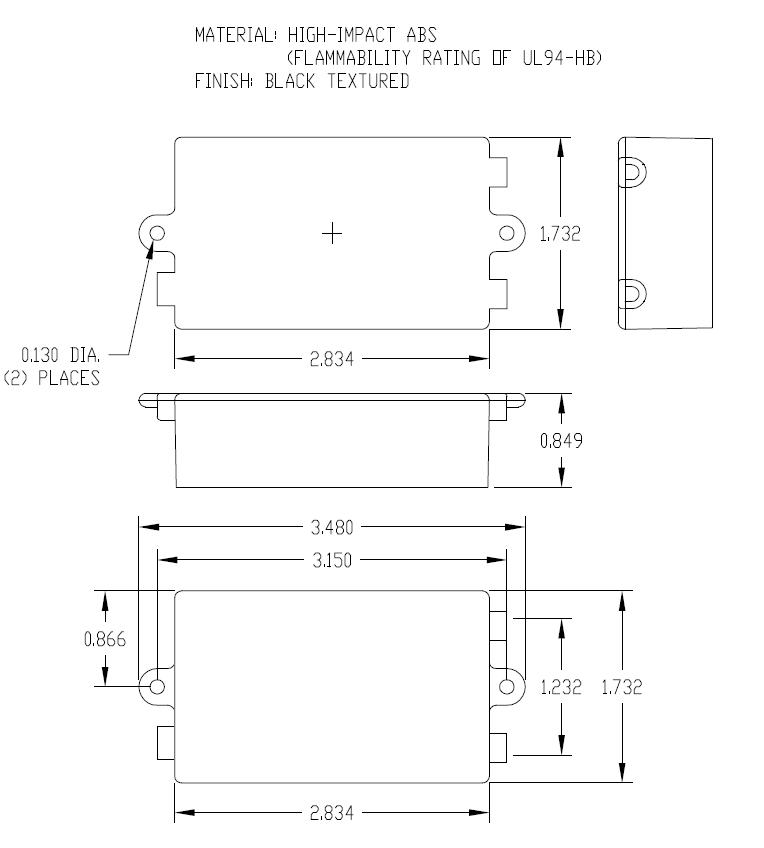
- Affix the Lightning Charger box firmly to a selected location, typically under or behind the vehicle dashboard, with #6 machine or sheet pan-head screws, though the existing holes provided on the box mounting tabs. (Charger box engineering drawing at http://www.scannerpal.com/images/sp5/satellite_box.jpg)
- Do NOT drill any holes, in any place, into or through the Lightning Charger box.
- The Lightning Charger box may be alternately mounted using nylon cable-ties, or with 3M Dual Lock(tm), as long as it is secure. Do not use any sort of tape, it will not hold the box securely.
- All cables must be supported with cable ties, at least every 12 inches along their lengths.
- During operation, inspect all cables periodically to see that no chafing occurs. If chafing does occur, shield the cable. If bare wiring appears, the system must be replaced. If sparking occurs, immediately remove the entire system.
Installation Test:
- Start with the phone manually turned OFF.
- Turn the ignition on, and observe the following sequence of events:
- Lightning box -- Red LED glows, indicating power and charge circuit ON.
- Phone -- Indicates battery charge.
- Lightning box -- Green LED blinks once per second, for a total of approximately 7 seconds.
- Phone -- Turns ON.
- After the phone has been turned ON, turn the ignition OFF, and observe
the following sequence of events:
- Lightning box -- Red LED is dim, indicating ignition power source is OFF.
- Phone -- No longer indicates a battery charge.
- Lightning box -- Green LED winks once per second, for a total of approximately 7 seconds.
- Phone -- Turns OFF.
Configuring Options:
There is a short pigtail jacketed bundle that comes out of the Lightning Charger box with 4 internal wires: Black (ground), Red, Green and White. To select any of the options, simply tie the appropriate option wire (either directly, or through a switch) to vehicle ground. The black wire provided may be used as the ground. These wires are NOT a source of current, and do not present an arcing hazard. You can simply leave the jacketed cable cut cleanly and tied back, if you do not wish to select any of the options.
- Red -- Disable all Lightning logic functions: The phone will still charge whenever power is applied to the Lightning Charger system.
- Green -- Disable Turn-OFF: The phone will still charge and automatically turn the phone ON whenever power is applied to the Lightning Charger system. The turn-ON sequence will be delayed by 30 seconds before power-up. This assures enough time for a completely drained cell battery to get charged up enough to sustain a phone power-up sequence.
- White -- Enable Delay: The turn-ON sequence will be delayed by 30 seconds upon power-up, the turn-OFF sequence will be delayed by 3 minutes after power-down. This option is recommended for installations in cold climates, as cold-soaked phones may take some time to initialize and subsequently respond to charging and logic commands. This option is also useful if the vehicle is to be operated in scenarios that involve short stops where the vehicle ignition gets briefly turned off and then on again, and it is desired to suppress phone turn-OFF turn-ON sequences during those brief (under 3 minute) stops.
LIMITED WARRANTY AND LIMITED REMEDIES
The ScannerPal, Inc. Lightning Charger is only to be used with a Nextel
Motorola Falcon Series phone, and the above installation and use
instructions must be followed; other installation or use of the cable voids
any Warranty. Manufacturer warrants that the Lightning Charger will be free
from defects in manufacture as properly installed and used, for one year
from the date of sale. Manufacturer will at its option repair replace the
defective parts. THIS WARRANTY IS MANUFACTURER’S ONLY WARRANTY. NO OTHER
WARRANTIES OR REMEDIES ARE PROVIDED. NO WARRANTIES OF MERCHANTABILITY OR
FITNESS FOR A PARTICULAR PURPOSE ARE PROVIDED. This Warranty does not cover
any non-conformance caused in whole or in part by accident, misuse, neglect,
alteration, modification or enhancement of the product.
ScannerPal, Inc.
Corvallis, OR