Important: Read
This FIRST!
The SP5 is
designed to firmly attach to the i355 phone, providing a rugged and unified
system. So it is very important to understand the correct way to attach and detach an
SP5 scanner, before attempting to do so for the first time. If the process is done improperly it can
result in permanent damage to the scanner!
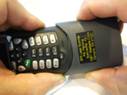
To
Attach: Flip open the rubber serial port cover
on the bottom of the phone, and push it down into the empty space in the front
of the scanner housing (1). Then tip the
scanner up (2), and without squeezing the
buttons, push the scanner up onto the phone (3):
(1) 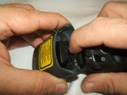 (2)
(2)  (3)
(3)
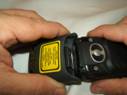
As the
scanner is pushed all the way up on to the phone, the internal connection hooks
will click into place on their own. If
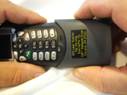
the phone is on, the screen will briefly display “Device Attached.”
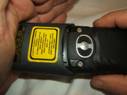
To Detach, Step by Step:
1) First, and most important, push the
scanner HARD up against the bottom of the phone, in order to release pressure
on the internal connection hooks.
2) SQUEEZE both buttons at the same time, and hold
them in. This will retract the internal hooks.
3) Use your other hand to help “wiggle” the scanner
off, side to side. DO NOT pull directly down.
If the scanner does not begin moving, and it feels as if it has hit a
“stop”, this means that the hooks have not fully retracted. Go back to Step 1,
and push it up firmly against the bottom of the phone again.
(1)  (2)
(2)
 (3)
(3)

If the phone is on, the screen will briefly display
“Device Attached”.
Most users of the SP5 can leave the scanner always
attached, contributing to longer life of the scanner by eliminating wear and tear
of the connectors. To facilitate leaving the scanner attached, the SP5 package
includes car and wall chargers so that the phone can be charged with the
scanner attached. An optional protective
leather case with belt clip is available direct from ScannerPal. It is custom-designed to fit the handset with
scanner attached.
ScannerPal, Inc.
Corvallis, OR